# GLM-130B
huggingface 体验地址: huggingface
# 摘要:何为 GLM-130B?
GLM-130B 是一个开源开放的双语(中文和英文)双向稠密模型,拥有 1300 亿个参数,模型架构采用通用语言模型(GLM)。
它旨在支持在一台 A100(40G * 8) 或 V100(32G * 8)服务器上对千亿规模的参数进行推理。
截至 2022 年 7 月 3 日,GLM-130B 已经对超过 4000 亿个文本标识符(中文和英文各 2000 亿)进行了训练,它有以下独特优势:
- 双语:同时支持中文和英文。
- 任务表现(英文): 在
LAMBADA上优于 GPT-3 175B(+4.0%)、OPT-175B(+5.5%)和 BLOOM-176B(+13.0%),在 MMLU 上略优于GPT-3 175B(+0.9%)。 - 任务表现(中文):在 7 个零样本 CLUE 数据集(+24.26%)和 5 个零样本 FewCLUE 数据集(+12.75%)上明显优于 ERNIE TITAN 3.0 260B。
- 快速推理:支持用一台 A100 服务器使用 SAT 和 FasterTransformer 进行快速推理(速度最高可达2.5倍)。
- 可复现性:所有的结果(超过30个任务)都可以用我们开源的代码和模型参数轻松复现。
- 多平台:支持在 NVIDIA、Hygon DCU、Ascend 910 和 Sunway 处理器上进行训练与推理(代码即将开源)。
由于工作需要,尝试进行部署GLM-130B模型,官网:GLM-130B
# 申请机器
支持在一台 A100(40G * 8) 或 V100(32G * 8)服务器上对千亿规模的参数进行推理
A100 机器,250元每小时,一个月约:18W,
V100 机器,157元每小时,一个月大约:11W
预算有限,就选V100机器吧
1.5T 的硬盘(模型大小260G,需要分包下载,下载后将模型聚合成一个压缩文件,再进行解压,
所以模型需要 260 * 3 G的空间)
# 登录机器
8个显卡
96核CPU, 724G内存,这么牛逼的机器,我还是第一次体验
操作系统:centos 7.9
# 安装必要依赖
yum update -y
yum install dnf -y
dnf groupinstall "Development Tools" -y
dnf install zlib-devel -y
yum install libffi-devel -y
yum install bzip2-devel -y
yum install openssl-devel -y
yum install libX11 -y
yum install libXext -y
yum install sqlite-devel -y
yum install libsqlite3-dev -y
yum install axel -y
yum install epel-release -y
yum install aria2 -y
此外,GLM-130B运行需要如下环境:
Python 3.9+ / PyTorch 1.10+ / DeepSpeed 0.6+ / Apex(需要安装包含 CUDA 和 C++ 扩展的版本,参考资料)
由于centos 7.9 默认自带 python 2.7 python3.6所以需要更新python版本,这里我选择使用miniconda进行环境管理。
安装流程:
wget https://z.wiki/autoupload/20230606/gI1w.Miniconda3-latest-Linux-x86_64.sh
sh gI1w.Miniconda3-latest-Linux-x86_64.sh
conda -V
# 创建 python3.9 运行环境
conda create -n py39 python=3.9
查看环境
conda env list
切换环境
conda activate py39
# 安装 apex
cd ~
git clone https://github.com/NVIDIA/apex
cd apex
pip install -v --disable-pip-version-check --no-cache-dir --global-option="--cpp_ext" --global-option="--cuda_ext" ./
😅报错了。。。。
  RuntimeError: Cuda extensions are being compiled with a version of Cuda that does not match the version used to compile Pytorch binaries.  Pytorch binaries were compiled with Cuda 11.7.
  In some cases, a minor-version mismatch will not cause later errors:  https://github.com/NVIDIA/apex/pull/323#discussion_r287021798.  You can try commenting out this check (at your own risk).
  error: subprocess-exited-with-error

  × Running setup.py install for apex did not run successfully.
  │ exit code: 1
  ╰─> See above for output.
从提示中可以看出Pytorch中要求Cuda 11.7,那机器上的Cuda是什么版本呢?,执行nvcc -V:
nvcc: NVIDIA (R) Cuda compiler driver
Copyright (c) 2005-2021 NVIDIA Corporation
Built on Wed_Jul_14_19:41:19_PDT_2021
Cuda compilation tools, release 11.4, V11.4.100
Build cuda_11.4.r11.4/compiler.30188945_0
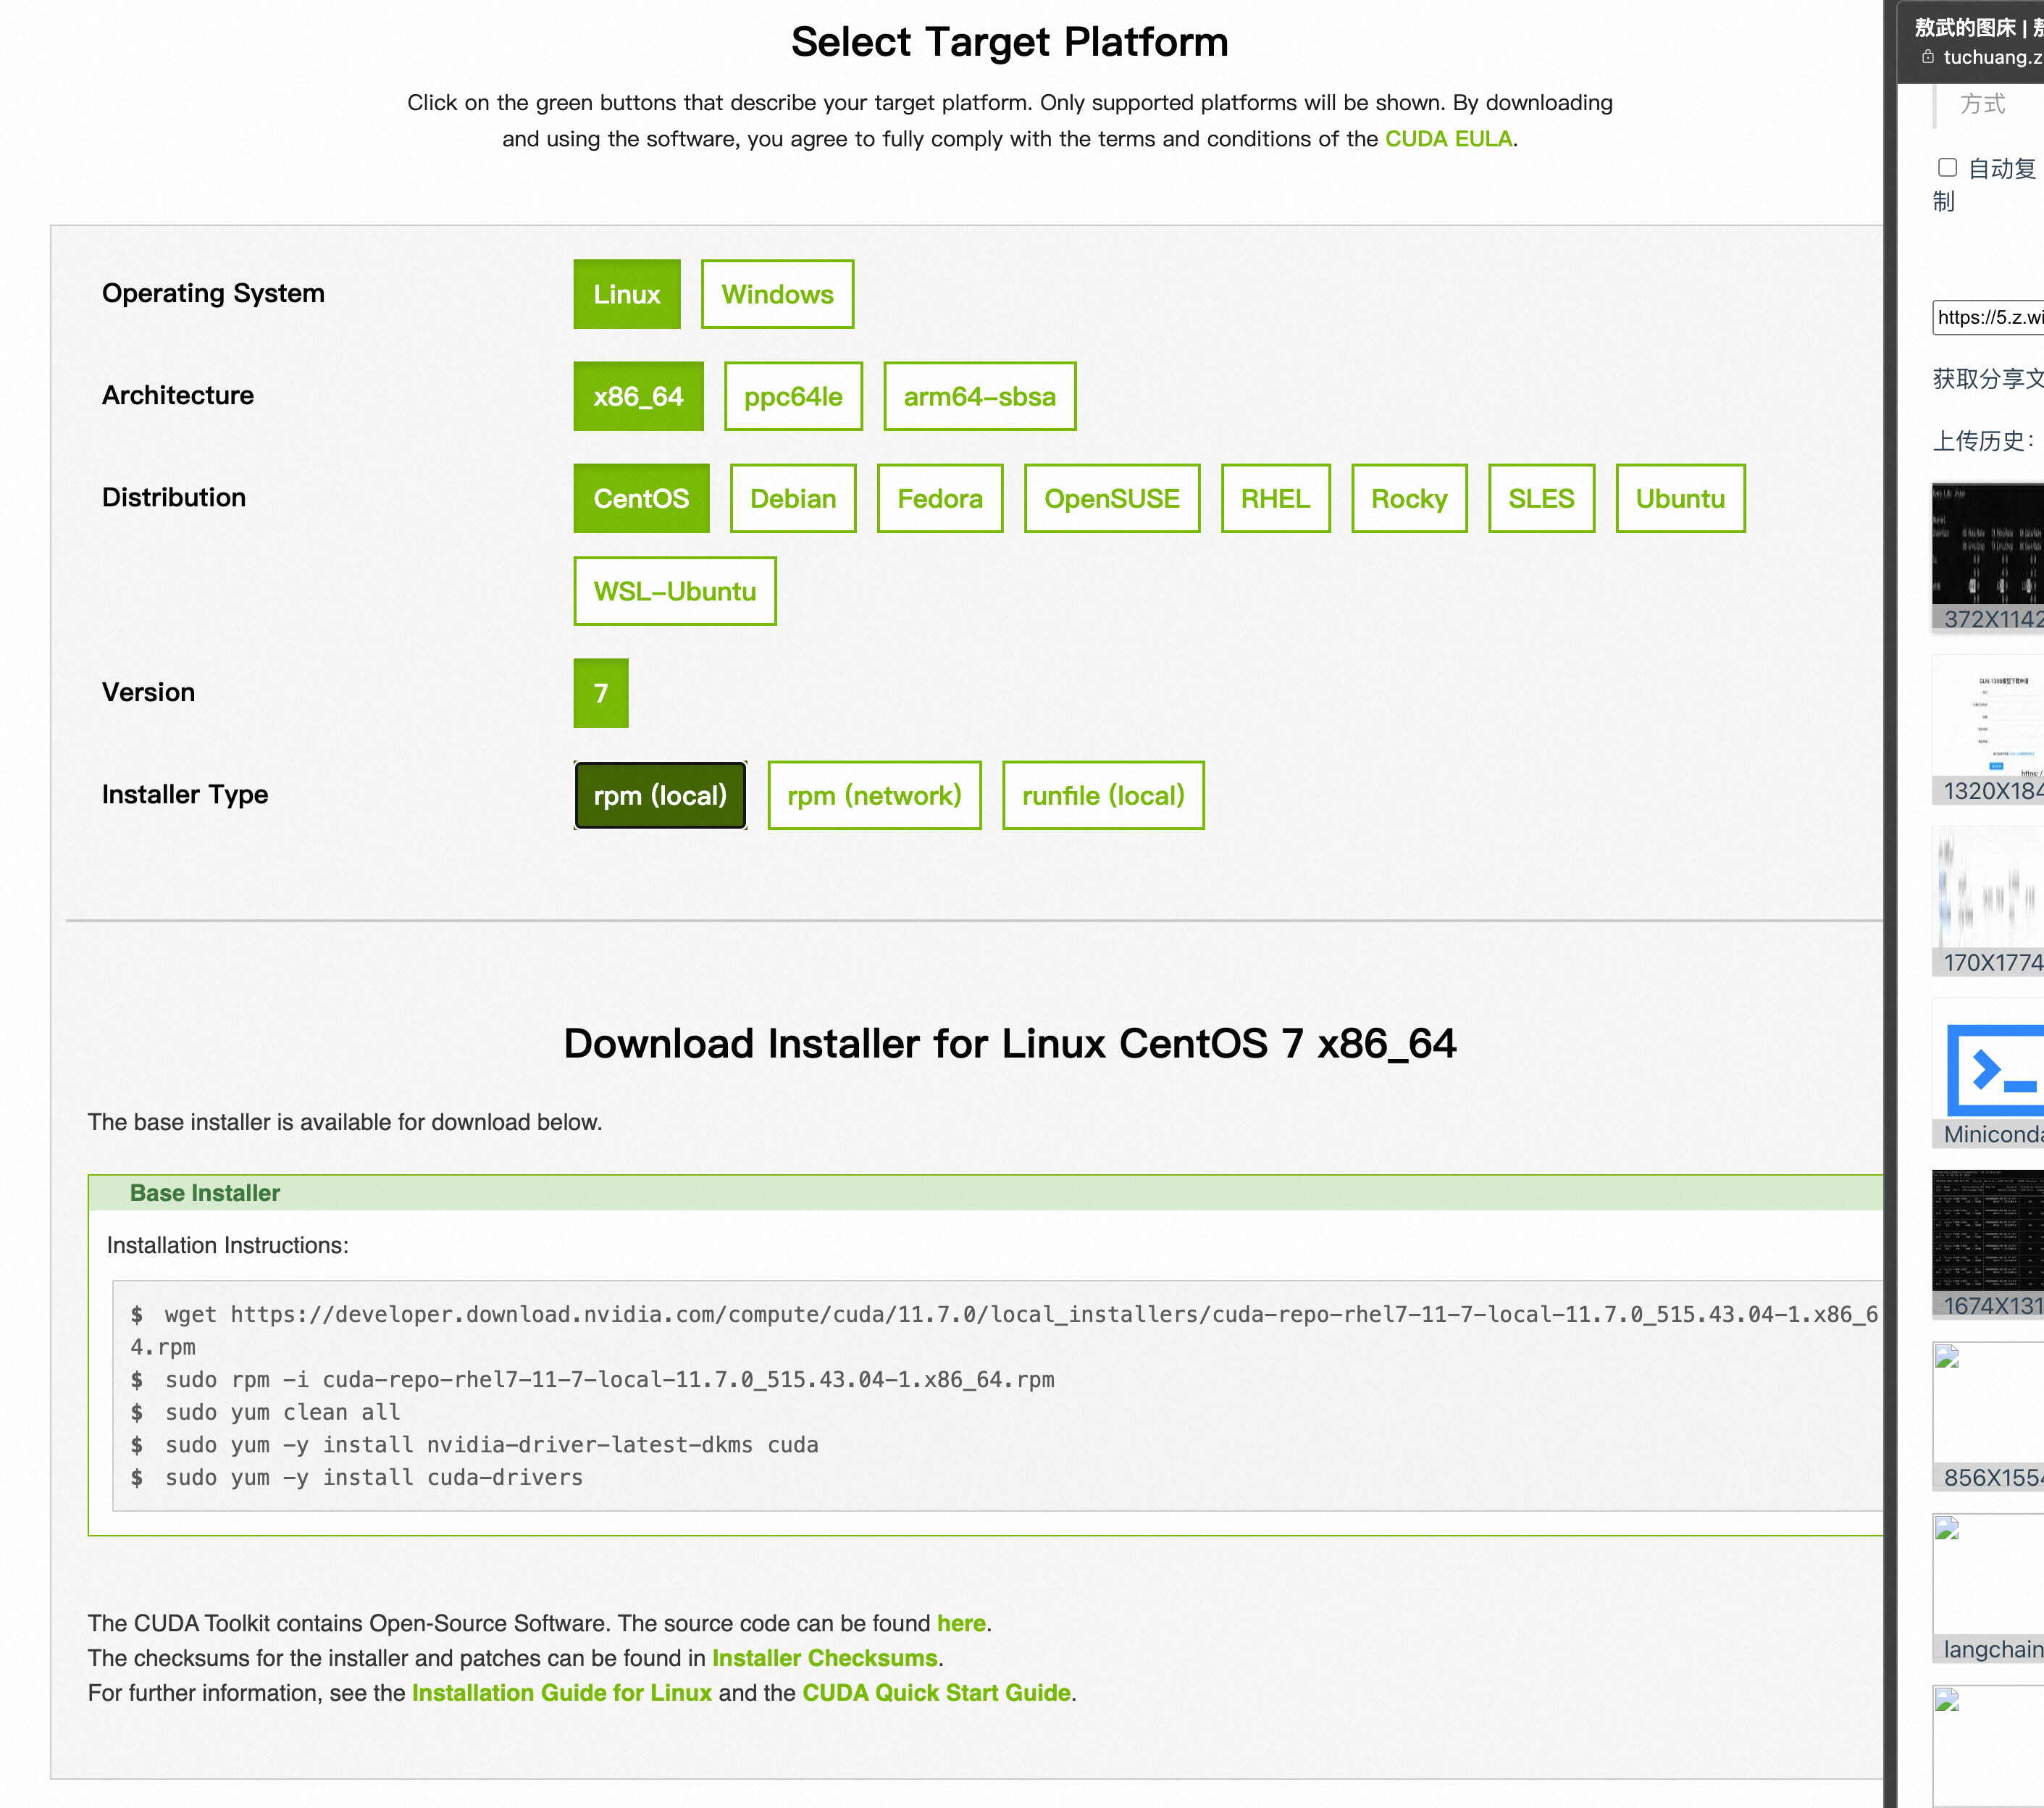
果然,二者不匹配了。那就安装Cuda 11.7吧,从英伟达官网就能找到安装脚本:
wget https://developer.download.nvidia.com/compute/cuda/11.7.0/local_installers/cuda-repo-rhel7-11-7-local-11.7.0_515.43.04-1.x86_64.rpm
rpm -i cuda-repo-rhel7-11-7-local-11.7.0_515.43.04-1.x86_64.rpm
yum clean all
yum -y install nvidia-driver-latest-dkms cuda
yum -y install cuda-drivers
到此,Cuda 11.7已安装完成,安装路径:/usr/local/cuda-11.7,通过设置CUDA_HOME这个环境变量后继续安装依赖:
export CUDA_HOME=/usr/local/cuda-11.7/
pip install -v --disable-pip-version-check --no-cache-dir --global-option="--cpp_ext" --global-option="--cuda_ext" ./
😅+1,还得升级g++,搞起!!别的本事没有,搞这些还是有点经验的!
      raise RuntimeError(
  RuntimeError: The current installed version of g++ (4.8.5) is less than the minimum required version by CUDA 11.7 (6.0.0). Please make sure to use an adequate version of g++ (>=6.0.0, <12.0).
  error: subprocess-exited-with-error
# 升级GCC
yum install centos-release-scl
sudo yum install devtoolset-8-gcc*
scl enable devtoolset-8 bash
gcc -v

# 注意:以上操作只对本次会话有效,重启会话后还是会变回原来的GCC版本
参考文档:简书
到此,继续安装apex未搞定的步骤即可安装成功。
pip install -v --disable-pip-version-check --no-cache-dir --global-option="--cpp_ext" --global-option="--cuda_ext" ./
# 下载GLM-130B源码
git clone https://github.com/THUDM/GLM-130B.git
安装依赖
cd GLM-130B
pip install -r requirements.txt
ps:百兆带宽,下载速度真快!!
如果下载过程慢的话也可以尝试切换到国内其他源
# 豆瓣源
pip install -r requirements.txt -i http://pypi.douban.com/simple/ --trusted-host pypi.douban.com

# 阿里云源
pip install -r requirements.txt -i http://mirrors.aliyun.com/pypi/simple/ --trusted-host mirrors.aliyun.com
# 下载模型
申请下载 GLM-130B 的模型checkpoint,目前需要申请才能下载,申请地址
申请后很快便会收到邮件,按邮件里的流程下载即可
注:模型较大,下载比较费时间。
mkdir ~/130b
cd ~/130b
wget https://z.wiki/autoupload/20230606/Okx1.urls.txt
aria2c -x 16 -s 16 -j 4 --continue=true -i Okx1.urls.txt
下载过程中可以通过ifstat来查看网络状况
watch -n 1 -c -d ifstat
12M 的下载速度,60 个文件总共 260G 大小的资源, 按这速度得下载 6 个小时 😭
到下载完、合并成一个文件、解压完,整整 9 个小时,天啦噜
按照官网要求修改配置:
将 configs/model_glm_130b_v100.sh 中的 CHECKPOINT_PATH 设置为解压文件夹的路径
将 scripts/generate.sh 中的 model_glm_130b.sh 改成 model_glm_130b_v100.sh,
# 开始运行
bash scripts/generate.sh --input-source interactive
一切顺利哈哈哈
然而,现实从来不像童话故事里那么完美,回答一个简单的“你好,你是谁?”居然要 200+ 秒
这 AI 是记性不太好?三亚出现了两次。。。
就酱吧,碎啦。。。
# 其他报错排查与修复
# nvidia-smi 报错
执行nvidia-smi的时候报错Failed to initialize NVML: Driver/library version mismatch,
这是因为系统中安装的NVIDIA驱动程序版本与应用程序使用的NVML库版本不兼容。
NVML是一个允许程序访问NVIDIA GPU监视和管理功能的库。
解决方案一:
解决方案二:


